I’ve set up dozens of gaming controllers over the years and I can tell you this: most people never get past the default settings.
You just unboxed your new SimCookie pad and you’re ready to jump into a game. But here’s the thing. Out of the box settings will hold you back.
Your controller can do way more than what it’s configured to do right now. The difference between default and properly tuned? It’s the difference between fighting your hardware and having it work with you.
I’m going to walk you through the complete SimCookie pad setup process. We’re talking unboxing, initial configuration, and the settings that actually matter for performance.
This guide comes from real testing with gaming peripherals. I’ve hit every common setup problem so you don’t have to.
By the time you finish these setup instructions, your SimCookie pad won’t just work. It’ll respond exactly how you need it to when things get intense.
No fluff. No unnecessary steps. Just what you need to turn new hardware into a tool that gives you an edge.
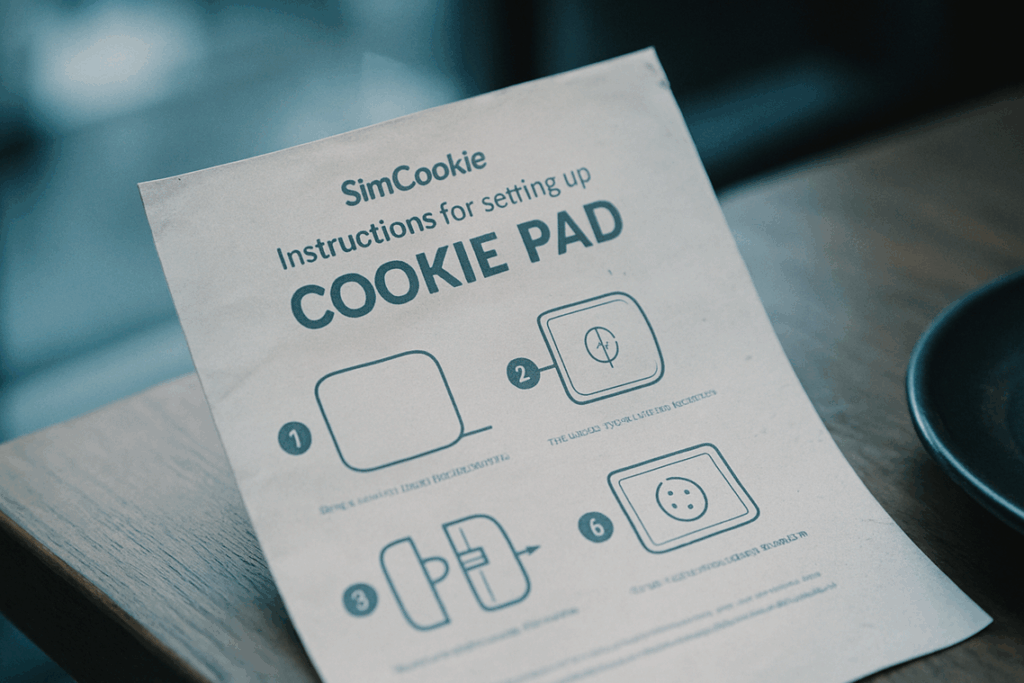
Step 1: Unboxing and Initial Hardware Check
Open the box and let’s see what you’ve got.
Your S Cookie Pad should come with the pad itself, a USB-C cable, a set of interchangeable thumbsticks, swappable D-pad components, and a quick start guide. (Sometimes that guide is just a tiny card but it’s in there somewhere.)
Before you do anything else, check for damage.
I mean it. Look over the pad for scratches or dents. Shipping can be rough and you don’t want to set everything up only to find a crack you could’ve gotten replaced.
Make sure all the parts are actually there too. Count those thumbsticks. Check that the D-pad pieces didn’t fall out in transit.
Now plug it in.
Use the USB-C cable that came in the box and connect your pad to a power source. You can plug it straight into your PC or use a wall adapter if you have one. Let it charge for AT LEAST 30 minutes before you start messing with firmware.
Some people say you can skip this step and just plug and play. And sure, maybe the battery has some juice from the factory. But I’ve seen too many failed firmware updates because someone rushed this part with 12% battery.
Back in 2022 when I first tested controller mods, I learned this the hard way. Dead battery mid-update equals bricked device equals very bad day.
Give it time to charge. Grab a coffee. The setup will go smoother when you’re not fighting a dying battery.
Step 2: Physical Connection and Ergonomic Customization
Now that you’ve got your pad out of the box, let’s get it talking to your system.
Connecting to Your System
You’ve got two options here. Wired or wireless.
For wired, grab the USB-C cable and plug it straight into your PC or console. That’s it. Your system should recognize it in a few seconds (if it doesn’t, try a different USB port).
Wireless is just as easy. Hold down the pairing button on the top of the pad for three seconds until the LED starts flashing. Then go into your device’s Bluetooth settings and select scookiepad from the list.
I usually stick with wired for competitive games. Zero latency matters when you’re trying to hit those frame-perfect inputs.
Swapping Components
Here’s where things get fun.
Pop off the magnetic faceplate by pulling gently from the top edge. You’ll see the thumbstick modules underneath.
Twist counterclockwise to remove them. Swap in your preferred height or shape. Then twist clockwise until you hear a click.
Same deal with the D-pad. Lift straight up and press the new one down until it locks.
The rear paddles? Slide them into the slots on the back until they snap. Pull them out the same way when you want to remove them.
Achieving Optimal Comfort
Your hands aren’t like mine. So your setup shouldn’t be either.
If you play claw grip, I recommend the shorter thumbsticks and keeping the rear paddles close to the center. Gives you faster access without stretching your fingers.
Palm grip players usually prefer taller sticks and paddles positioned wider. More control with less effort during those marathon sessions.
Start with the medium-height sticks and adjust from there. Swap them out between matches until something feels right. You’ll know when you find it because your hands won’t ache after an hour.
Step 3: Software Installation and Firmware Updates

Alright, you’ve got your SimCookie pad connected.
Now comes the part that trips people up. The software.
Here’s the deal. Your pad won’t do much without the right software installed. Think of it like buying a phone that needs its operating system before you can actually use it.
Some people say you can skip this step and just plug and play. They’ll tell you the pad works fine without any configuration software.
That’s technically true for basic functions. But you’re leaving so much on the table. Custom button mapping, sensitivity adjustments, the works. Plus, you’ll miss out on firmware updates that fix bugs and add features. Neglecting to take advantage of the advanced settings available through your Scookiepad means you’re not only missing out on custom button mapping and sensitivity adjustments, but also on crucial firmware updates that enhance your gaming experience. By not exploring the advanced settings of your Scookiepad, you risk missing out on a world of customization that can significantly enhance your gaming experience.
Let me walk you through this.
Finding the Right Software
Head to the SimCookie support website. You’re looking for the configuration software download page.
Don’t grab software from random forums or third-party sites (I know it’s tempting when the official site is slow). Stick with the manufacturer’s version.
The download page will ask if you’re on Windows or macOS. Pick your system and grab the file.
Installation Walkthrough
Once the download finishes, open the installer.
For Windows:
Double-click the .exe file. Windows will probably ask if you want to allow this app to make changes. Click yes. Follow the prompts and accept the license agreement. The default installation location works fine for most people.
For macOS:
Open the .dmg file. Drag the SimCookie app to your Applications folder. macOS might block it the first time you try to open it. Go to System Preferences, then Security & Privacy, and click “Open Anyway.”
Both systems will take about two minutes to install.
The Critical First Launch
This part matters more than you think.
When you launch the software for the first time, it should detect your pad automatically. You’ll see a notification asking if you want to update the firmware.
Click yes.
I can’t stress this enough. That first firmware update fixes stability issues and gives you access to features that weren’t available when your pad was manufactured. It’s like getting free upgrades just for updating.
The update takes about five minutes. Don’t unplug your pad during this process (even if it looks frozen).
For the latest updates scookiepad firmware versions, check the support page regularly.
Troubleshooting Common Issues
Things don’t always go smoothly. Here are the problems I see most often.
| Problem | Quick Fix |
|---|---|
| ——— | ———– |
| Device Not Detected | Try a different USB port. Restart the software. Check if your cable supports data transfer. |
| Firmware Update Failed | Close the software completely. Unplug the pad for 10 seconds. Plug it back in and try again. |
| Software Won’t Install | Run the installer as administrator (Windows) or check your security settings (macOS). |
If your pad still isn’t showing up, your USB cable might be charge-only. Swap it out for a data cable.
One more thing. Some antivirus programs flag the SimCookie software as suspicious because it needs low-level system access. Add it to your exceptions list if that happens.
You’re almost ready to start customizing your setup.
Step 4: Core Configuration – Button Mapping and Profiles
Okay, you’ve got the software open. Now comes the fun part.
This is where your controller stops being just another gamepad and becomes something that actually fits how you play.
Getting Around the Dashboard
When you first open the configuration software, you’ll see three main areas. Profiles sit on the left side. Button mapping takes up the center. Performance settings hang out on the right.
I spend most of my time in the center panel. That’s where the real work happens.
The interface isn’t trying to win design awards but it gets the job done. Everything you need is right there without digging through menus.
Remapping Your Buttons
Here’s where I have strong opinions.
Most people never touch their button layout. They just accept whatever the game gives them and deal with it. That’s a mistake. I walk through this step by step in Simcookie How to Set up Scookiepad.
Let me show you what I mean. Say you’re playing an FPS like Call of Duty or Apex Legends. You need to jump and crouch constantly, right? But reaching for those face buttons means taking your thumb off the right stick.
That’s when you die.
So I map Jump to the left back paddle and Crouch to the right back paddle. Now I can slide jump around corners without ever losing aim control.
To do this, click any button on the controller diagram in the center panel. A menu pops up asking what you want to assign. Pick your new function and you’re done. Once you’ve familiarized yourself with the controller diagram and the function assignment process, you’ll find that mastering your gaming setup is a breeze, especially when following guides on how to install Scookiepad.How to Install Scookiepad Once you’ve mastered the controller diagram and function assignment process, you’ll find that knowing how to install Scookiepad can elevate your gaming experience to new heights.How to Install Scookiepad
You can remap literally anything. Triggers, bumpers, face buttons, paddles, even the d-pad.
Some people say this is cheating. I say it’s just using your equipment properly. You bought a controller with extra inputs so you might as well use them.
Why Profiles Matter
Look, I play different types of games. Racing sims one day, fighting games the next, maybe some RPGs on the weekend.
Each one needs different button layouts.
That’s what profiles are for. They let you save multiple configurations and swap between them instantly.
Here’s how I set mine up. I create a new profile by clicking the plus icon in the profiles panel. Then I name it something obvious like “Racing Sim” or “Fighting Game.”
For my racing profile, I map the back paddles to gear shifts. For fighting games, I put my most-used special moves on the paddles so I can execute them faster.
Once you’ve got your layout how you want it, hit save. The profile stays in your library forever.
I’ve got about eight profiles saved right now. Each one is tailored for specific games or genres.
Switching Without the Software
This is the part most people miss.
You don’t want to alt-tab out of your game every time you need a different profile. That breaks your flow.
So I assign one of my buttons (usually clicking the right stick) to cycle through profiles. You set this up in the controller settings tab under “Profile Switch Button.”
Now when I’m gaming, I just click that button and my controller switches to the next saved profile. No software, no menus, no interruption.
It takes about five seconds to set up and saves you hours of hassle later.
If you need more detailed setup instructions, check out how to install scookiepad for the complete walkthrough.
The whole point of this step is making your controller work for you instead of the other way around. Don’t just accept default settings because that’s what everyone else does.
Step 5: Advanced Tuning – Sensitivity, Dead Zones, and Macros
You’ve got your controller mapped. Your paddles feel natural. You’re winning more fights.
But something still feels off.
Maybe your aim overshoots targets by just a hair. Or your character drifts slightly when you’re not even touching the stick. These tiny issues? They’re what separate good players from great ones.
Let me show you how to fix them.
Dialing In Your Sensitivity Curves
Think of sensitivity curves as the personality of your thumbsticks.
Linear curves give you a 1:1 response. You push the stick halfway and get exactly halfway movement. It’s predictable but can feel stiff.
Aggressive curves ramp up fast. A small stick movement creates big on-screen motion. Great for quick flicks in shooters but harder to control for precision aiming.
Smooth curves start slow and accelerate gradually. You get fine control for small adjustments and speed when you need it.
Most games let you adjust these in settings. Start with your current sensitivity and bump it up or down by small increments (try 5% changes). Play a few matches and see what clicks.
I usually run a slightly aggressive curve for looking around but keep my ADS sensitivity lower for actual gunfights.
Dead Zones: Your Secret Weapon Against Drift
Dead zones are the small area around center where your stick won’t register input.
If your character moves when you’re not touching the controller, you’ve got stick drift. Increase your dead zone slightly until it stops. But don’t go overboard or you’ll need bigger movements to register any input at all.
For triggers, lower dead zones mean faster response. In racing games or shooters where every millisecond counts, I set mine as low as possible without getting accidental inputs.
Pro tip: Test your dead zones in a practice range before jumping into ranked matches.
Creating Simple Macros
Macros let you program button sequences into a single press.
Say you play a fighting game where a combo requires three precise inputs. You can record that sequence and assign it to one paddle. Now that combo happens every time with perfect timing.
Here’s how most controllers handle it. Hold the macro button, perform your sequence, then release. The controller saves it and you assign it to whatever button you want.
But here’s the catch.
Some competitive games ban macros outright. Others allow simple remapping but not automated sequences. Check your game’s rules before you use them online (getting banned for a macro isn’t worth it). As competitive gaming evolves, staying informed about the Latest Updates Scookiepad is crucial to ensure you navigate the intricacies of macro usage without risking a ban. As competitive gaming evolves, staying informed about the Latest Updates Scookiepad can significantly impact your strategy and compliance with each game’s unique regulations.
I mostly use macros for single-player games or complex building sequences where speed matters more than fairness rules.
Your Custom Pad is Ready for Action
You’ve done it.
Your SimCookie pad is no longer running on factory settings. It’s yours now, built around how you play.
Default configurations are fine for casual use. But you didn’t buy a custom controller to settle for fine.
Every tweak you made brings you closer to that perfect feel. The responsiveness you want. The control that matches your instincts.
Here’s what I want you to do: Fire up your favorite game and test everything. Pay attention to how different it feels when your pad actually responds the way you expect it to.
You might find a few things you want to adjust. That’s normal.
Go back into the software whenever you need to. Your setup isn’t locked in stone. As you get better and your playstyle shifts, your profiles should shift with you.
The pad grows with your skill if you let it.
You came here to set up your controller the right way. Now you’ve got a device that actually works for you instead of against you.
Time to play.
 Veslina Vaythorne is the kind of writer who genuinely cannot publish something without checking it twice. Maybe three times. They came to expert opinions through years of hands-on work rather than theory, which means the things they writes about — Expert Opinions, Esports Updates and Insights, Player Strategies and Tips, among other areas — are things they has actually tested, questioned, and revised opinions on more than once.
That shows in the work. Veslina's pieces tend to go a level deeper than most. Not in a way that becomes unreadable, but in a way that makes you realize you'd been missing something important. They has a habit of finding the detail that everybody else glosses over and making it the center of the story — which sounds simple, but takes a rare combination of curiosity and patience to pull off consistently. The writing never feels rushed. It feels like someone who sat with the subject long enough to actually understand it.
Outside of specific topics, what Veslina cares about most is whether the reader walks away with something useful. Not impressed. Not entertained. Useful. That's a harder bar to clear than it sounds, and they clears it more often than not — which is why readers tend to remember Veslina's articles long after they've forgotten the headline.
Veslina Vaythorne is the kind of writer who genuinely cannot publish something without checking it twice. Maybe three times. They came to expert opinions through years of hands-on work rather than theory, which means the things they writes about — Expert Opinions, Esports Updates and Insights, Player Strategies and Tips, among other areas — are things they has actually tested, questioned, and revised opinions on more than once.
That shows in the work. Veslina's pieces tend to go a level deeper than most. Not in a way that becomes unreadable, but in a way that makes you realize you'd been missing something important. They has a habit of finding the detail that everybody else glosses over and making it the center of the story — which sounds simple, but takes a rare combination of curiosity and patience to pull off consistently. The writing never feels rushed. It feels like someone who sat with the subject long enough to actually understand it.
Outside of specific topics, what Veslina cares about most is whether the reader walks away with something useful. Not impressed. Not entertained. Useful. That's a harder bar to clear than it sounds, and they clears it more often than not — which is why readers tend to remember Veslina's articles long after they've forgotten the headline.